Hey all! I’m Vicky; Jamillah and I have known each other since high school (eek), while she’s off enjoying life and getting an amazing tan in St. Lucia (confession: I’m pasty, landlocked, and jealous) let’s get busy so we have some great stories to tell her about all the made-to-travel activity she missed while she was away.
A little about me: I’m not a blogger yet HOWEVER I am a bootlegger heiress. One of my great-grandfathers was a bootlegger in Puerto Rico during Prohibition, so it is in fact a part of my genetic legacy to bootleg.
So I don’t bootleg alcohol like my great-grandfather- my favorite thing to bootleg is nail art!
I hate paying someone to do something that I can do myself. Why pay for a mani that I will inevitably chip in 30 seconds by living my life aka washing dishes, looking for my keys, and randomly tapping my nails on things?
If there is a hell my version of it is an eternity of chipping manis I paid someone else to do!
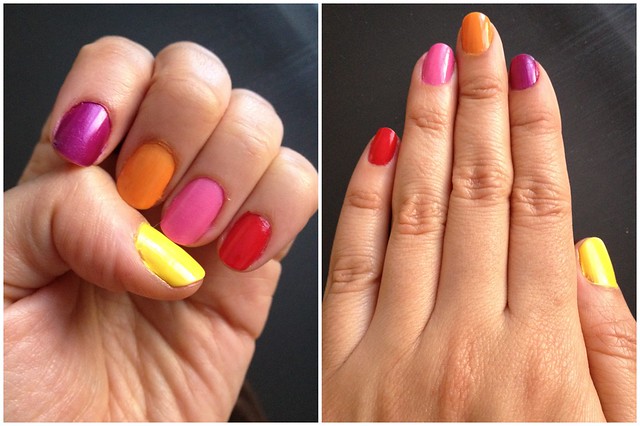
Today I’ll be showing you how I bootlegged a nail dotting tool to get this mani.
Many people would refer to my bootlegging as DIY but what I do is more gangster and illicit so bootlegging it is! Plus at some point during my bootlegging projects somebody usually gets hurt.
Let’s Get This BIY Started!
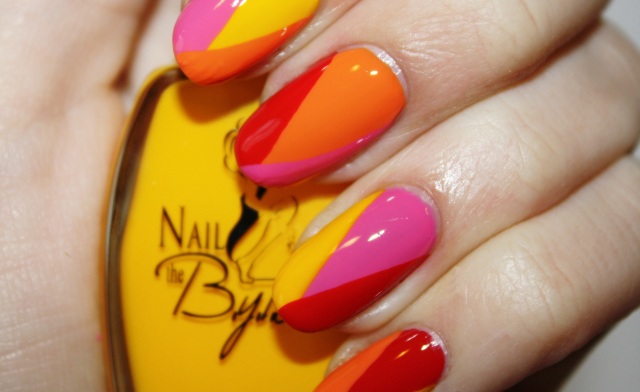
So the inspiration behind this mani comes from Polish You Pretty.
I love the mani from Polish You Pretty but I wanted to add dots to the mix. A little springtime, a little circus-y, a lot bootleg.
Here is how I did it with random things that everyone has at home.
Step 1: Pick your polish!
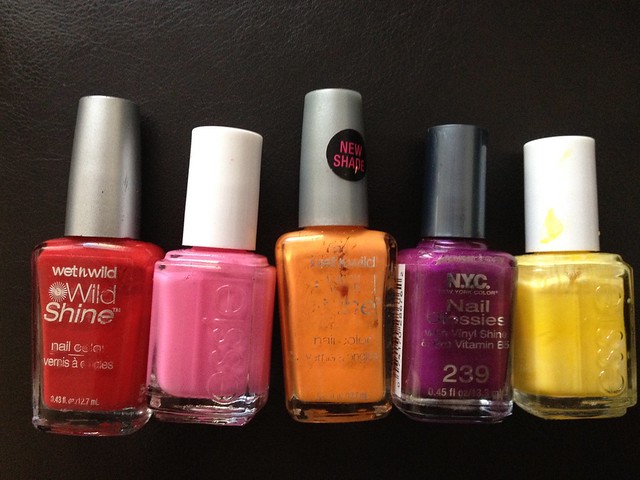
Here are the polishes I used. I pulled two Wet-N-Wild, two Essies, and an NYC brand polish out of my stash. Again, we are bootlegging – use what you have, snag some from your friends, steal your little sister’s, whatever.
Step 2: Paint your nails
The trick I use when painting different layers or designs on top of the nail is that I paint my nails before I go to bed and let them dry overnight.
I have no patience and have flown into fits of rage by trying to paint designs over wet nails too soon.
Step 3: Diagonal Time
To do the diagonal we’re going to use some good old Scotch tape.
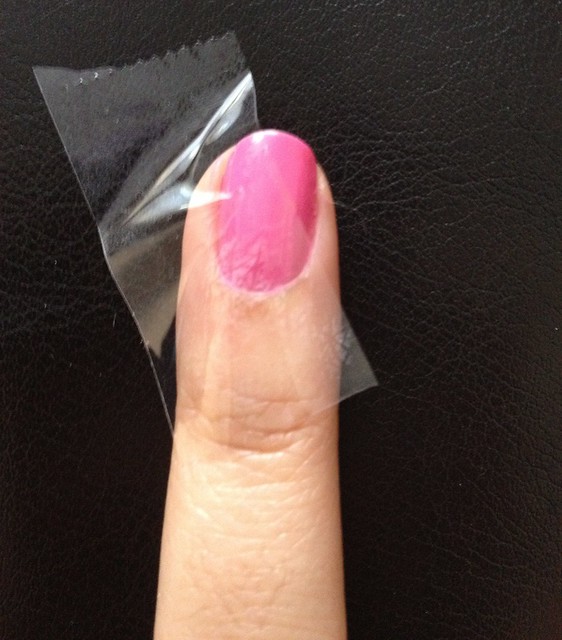
Now if your nails haven’t dried for 700 hours then when you put the Scotch tape on it will pull your nail polish right up. If they are dry put the tape on your nails on a diagonal and press it down really hard. You want to make sure it adheres to your nails so that no polish seeps under when you paint.
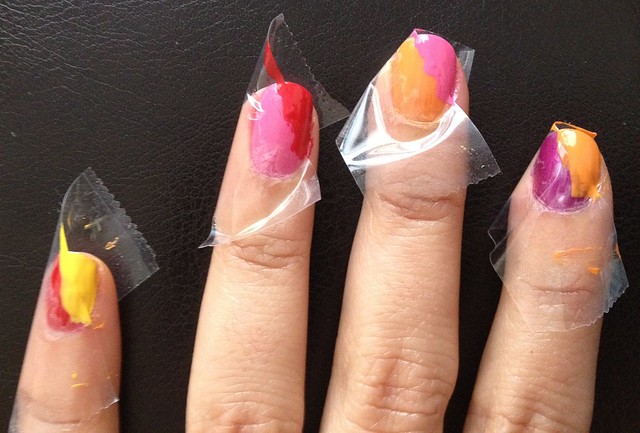
Once your tape is stuck pick a contrasting color and paint right on top of your nail and the tape. Wait until its dry, seriously dry, and then peel the tape off.
Step 4: Bootlegging time!
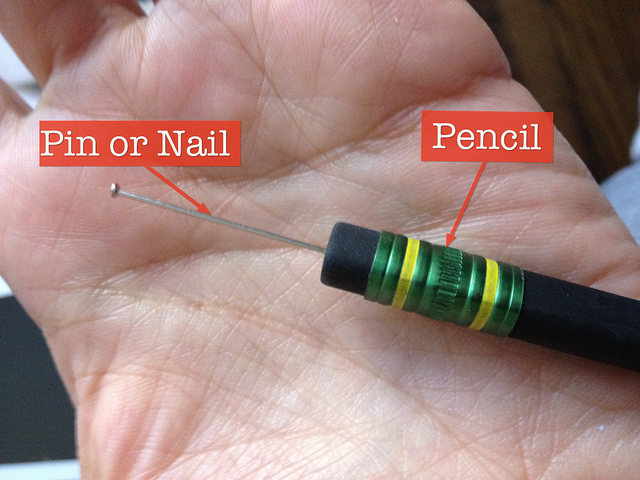
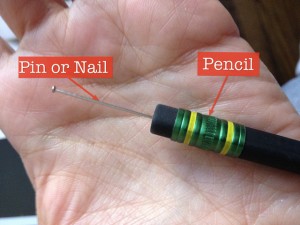
So dotting tools are faaaaaancy and I’m bootleg so here’s mine.
What you’ll need:
- Straight pin or needle or nail
- Pencil with an eraser
Take a straight pin and stick the pointed end into the eraser of a pencil (this may or may not be the part where somebody gets hurt).
Voilá dotting tool :P.
Step 5: Dot dot dot
Then use a magazine and blob a dot of the nail polish onto the paper. Stick the end of the pin in the nail polish and practice your dotting technique a little bit. Once you get your dot flow going start randomly dotting your nails.

Step 6: Top it off
Watch 15 minutes of TV and then hit your nails off with a topcoat. Now topcoat is necessary because it will make your nails glossy and beautiful and kind of ease the look of any weird mistakes you made.
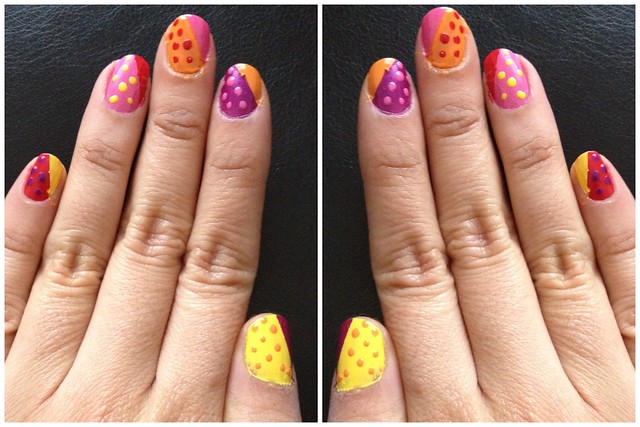
Now my nails aren’t perfect, perfection takes practice/time, and I did my nails this morning when I was practically unconscious.
What’s great about nails is that no one looks at your nails as closely as you do unless you just got engaged or are taking a senior photo where you’re looking over your shoulder while holding a fake rose. So make mistakes, apply some top coat, and keep it moving! And whenever you wanna do your nails and think “oh that looks so nice I wish I could do that” – feel free to bootleg.




Love this! I’m going to give the bootleg dotting tool a try!
Rocquelle recently posted..Impulsive Sequins
I love La and her blog…and I love you guest blogging! Laughed in my office cubicle and CANNOT WAIT to try this myself =)
CC
Clever & resourceful. I love it! Beautiful BIY … I like that! 🙂
Looks great! I am thinking of giving it a try.
rashmi recently posted..Where to buy Dansko Marah Shoes?
These look so much fun!
Patricia Streeter recently posted..Dr. Brandt Pores No More Anti-Aging Mattifying Lotion
This post is hilarious and enlightening!!! I really enjoyed reading and learning from it…you should do more of it, Vicky!
What a great post! I love your polka dot how to.
Heather recently posted..A Coat for Spring
How clever. I never actually thought to use a pin to do this. I love the colors too-a really good combination!
http://thriftyandshameless.blogspot.com
Miss Rockwell recently posted..Friday Favorites…Vol #13
Vicky!! I am totally late, but I ELLE OH VEE EEEED This post! So clever and practical! Kept me laughing and wanting to try it out. AWESOME!